Lets see, where to begin on this how to? I chose this subject after a friend (not mentioning names *cough*Alex*cough*) tried to build his first server and mounted the mother board FLAT against the back plain then couldn't figure out why it come on as soon as he plugged it in. But what can you expect from someone who works a software help desk all day. Ok, enough giving him grief about it, On to the fun stuff.
First, I am going to be as through as possible. but if you still feel this is beyond your capabilities, seek advice from someone more expeienced like at www.forumoc.com or email me for a better explanation. And I have to mention the usual precautions, use a grounding strap or touch a grounded case (while the power supply is still plugged in). This will discharge any static charge that may have built up on your skin from moving. It takes a very small amount of static to kill a mother board. Also, a mother board and any other cards should ONLY be held by the edges, never by the components or on the flat sides.
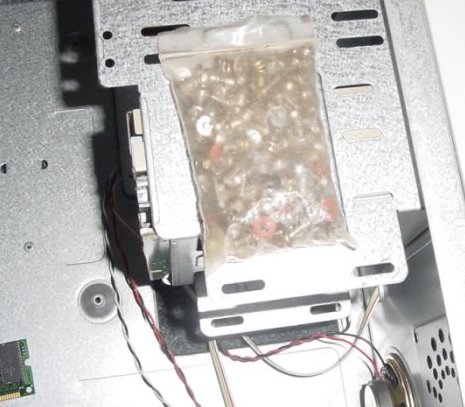
Start by unpacking the case. Give it a quick look for damage, and look for a small bag of screws usually stuffed someplace hard to find.
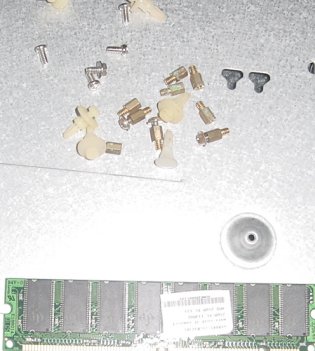
In this bag will be all the hardware you need to mount everything in your computer.... and a few screws to loose. Digging thru this bag, you will find some hex head screws, some phillip head screws, some brass screws with a hole in the top, some plastic stand offs, and some red or brown non metallic washers. Seperate the brass stand offs, the plastic stand offs and find the screws that will thread easily into the brass stand offs.
Unpack your mother board. a quick look for damage and its ready to be RMAed or mounted. If you set the motherboard in the case in about the position that will line the ports up with the back of the case, you will see that holes in the motherboard and holes in the back of the case line up.

Screw a brass stand off into these holes. There should be three along the back, three about the middle of the motherboard, and two or three holes along the front of the mobo that dont quite line up. Here is a shot of the back plane of my server with the holes circled.


As you can see, this case has holes for other styles of mother board, like microATX, AT, baby AT, each of these will have hole patterns that are slightly different based on the size of the motherboard. I have marked the typical holes for an ATX motherboard. The circles with nothing in them mark locations of flat stand offs, the notches are for the type of standoff with a small peg on the end. these stand offs are usually located where the motherboard my be pulled on lightly. like removing a cable or ram. As you can see from the blurry pic on the right, some cheap cases have raised holes in a pattern that is designed for only one type of motherboard. In this case, the brass standoffs are not needed, only screws and the plastic standoffs.
Once the brass stand offs are mounted and the plastic standoffs are inserted into the remaining holes in the motherboard. Its time to line it up and screw it into place.

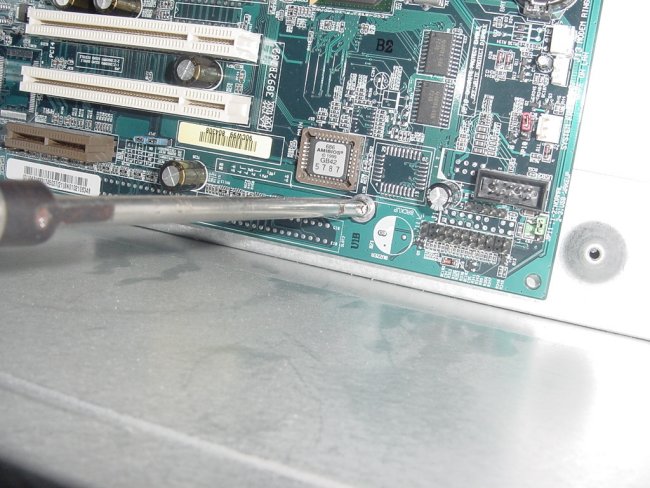
Tighten the screws, but you don't need to get overly aggressive on them, just snug enough the motherboard wont move. You should have three screws along the back edge, two or three in the middle and one or two along the front, with plastic stand offs in the remaining places.
Your done, time to mount the components and wiring...